Step 5; Bigger Steps Cont..
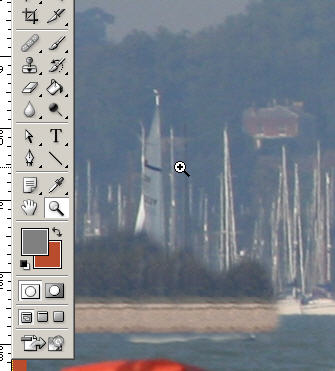
As this new portion of shoreline has been created by copying one small section over and over, there will be an obvious pattern appearing. Get rid of this to some extent by using the "Smudge Tool". Use this tool to just generally mess up those areas that show a distinct pattern from the lconing process. This is what is going on in the image here. Don't be too fussy as it will all look different when the picture has been re-sized etc later on.So far, we have copied a very small section of the right hand shore line over to the left. Now we need to wonder how we are going to extend this to cover the remainder of the unwanted image.
Well, you can wave the cursor around a bit more up and down. As long as you have not released the left mouse key, you will copy what is above and below the start line. If you move the cursor too far to the left, you will end up reproducing parts of the ship's stern. Now re-centre the Clone Tool on a portion of the "new" shoreline that you have just created on the left. Again, mark the point on the ruler where the cursor lies and make your selection. Move the cursor toward the end of the new piece of shoreline and repeat the previous clone process. If you have got it right, the shoreline, trees etc will begin to extend. Repeat as necessary until you get a shoreline that extends to the edge of the page. This image shows part of the extended shore, complete with cloned trees. You will see that, while the yachts are disappearing, one of them has left a wake trail that is now lurking just below the shoreline so, carefully positioning the Clone Tool cursor on the stretch of water just below the wake, we can clone that out too.